
Troubleshoot Connection Issues Faster with Connectivity Diagnostics
Secure and reliable connectivity is an integral part of any IoT project. But when things go wrong and devices lose their cellular connection, it can lead to costly downtime and negative user experiences.
Given the numerous factors at play – such as device software configuration, SIM Statuses, network settings and even service outages – simply troubleshooting the outage can be a time-consuming endeavor.
That is where the new Soracom Connectivity Diagnostics can help. These new diagnostic features give you a high-level view of the cellular connection status between your device and Soracom, so you can easily narrow down where an issue might be and focus on that area.
Connectivity Diagnostics is now available in the Soracom User Console and included as a free service for all active subscribers. In this article, we walk through using each part so you can start to leverage these capabilities today.
In this article:
- Navigating the Diagnostic Screen
- Getting your SIM Active
- Establishing a Data Session
- Transmitting Data Successfully
- Managing Connectivity Diagnostics via API
- Getting Started with Connectivity Diagnostics
Navigating the Diagnostic Interface
Often, the first hurdle innovators face is establishing a connection to the cellular network. This seems like a basic first step but often quickly escalates as traditional network providers do not provide specific device or network details.
Soracom’s new Connectivity Diagnostics unlocks information previously only available to network operators about your devices. Now you can use these abilities to check your SIM and the cellular connection for possible issues and follow procedures to address the problems.
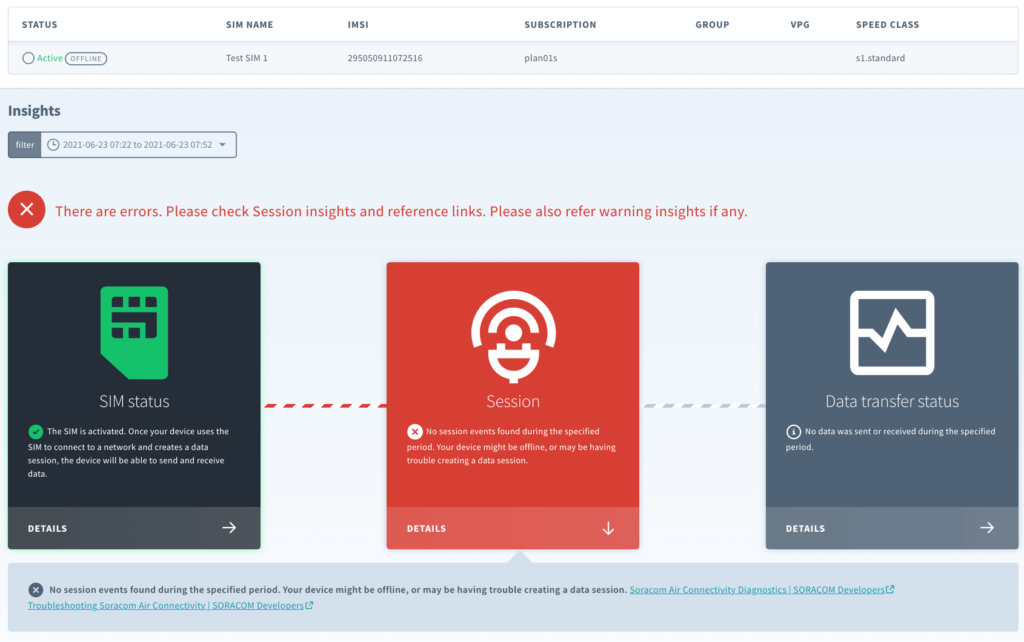
You can easily see all of the vital information about your SIM card, the data session between your device and Soracom, and if data has been successfully transmitted.
Click here for information regarding the connection process
Getting your SIM Active
Connectivity Diagnostics first checks that all of the essential SIM settings are configured correctly. If anything seems incorrect, this feature provides guidance what needs to change, such as reactivating a SIM.
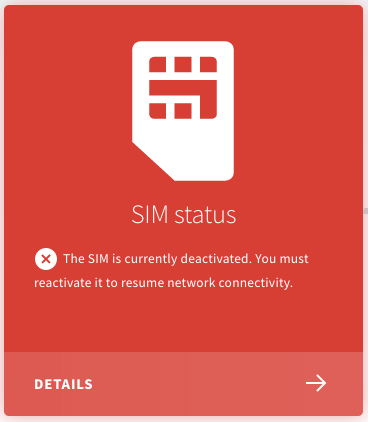
If your existing SIM card hasn’t been set to ACTIVE in our User Console, you’ll see the following notification.
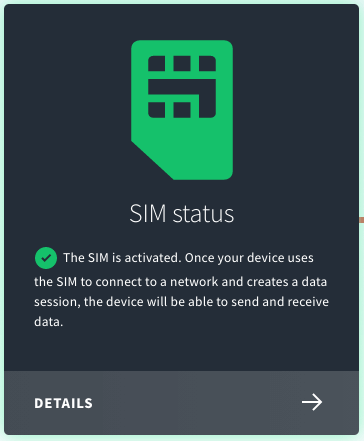
Once you’ve activated the SIM card, the diagnostic screen will indicate that your SIM has the correct status.
Click here for more information regarding SIM Status
Establishing a Data Session
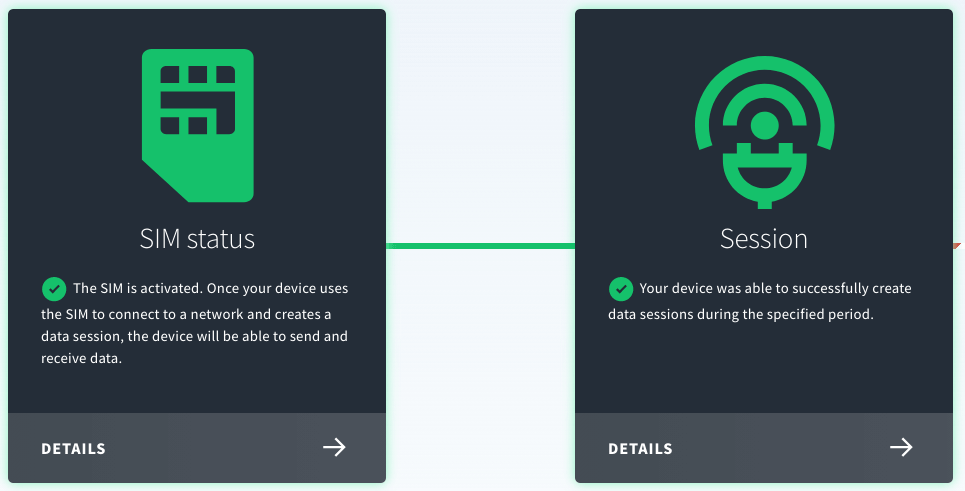
After your SIM is activated, the next step is making sure that a data session is created between your device and Soracom. In the screenshot below, the diagnostics function shows that you have an active SIM but that a data session is needed.
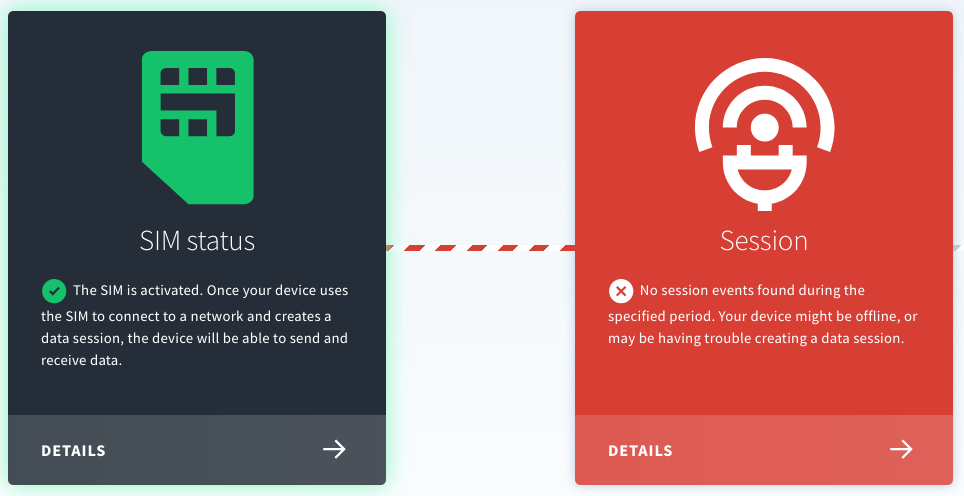
Connectivity Diagnostics will suggest that device-side investigation is needed.

You should check the device to make sure that the modem is attempting to create a data session. To help with this, here is a list of common issues that might be related to why your device is not creating a data session:
- Device with a 2G/3G modem that doesn’t have the APN configured properly to soracom.io
- Roaming is enabled
- Device incompatibility with the Soracom SIM card
- Low device signal strength
- Device incompatibility with local carrier network frequencies
- SIM card damage
- SIM card not being inserted correctly
Once you have solved the issue related to your device and an active data session has been created, the diagnostics screen will indicate the corresponding status.
Click here for more information regarding session status
Sending Data Successfully
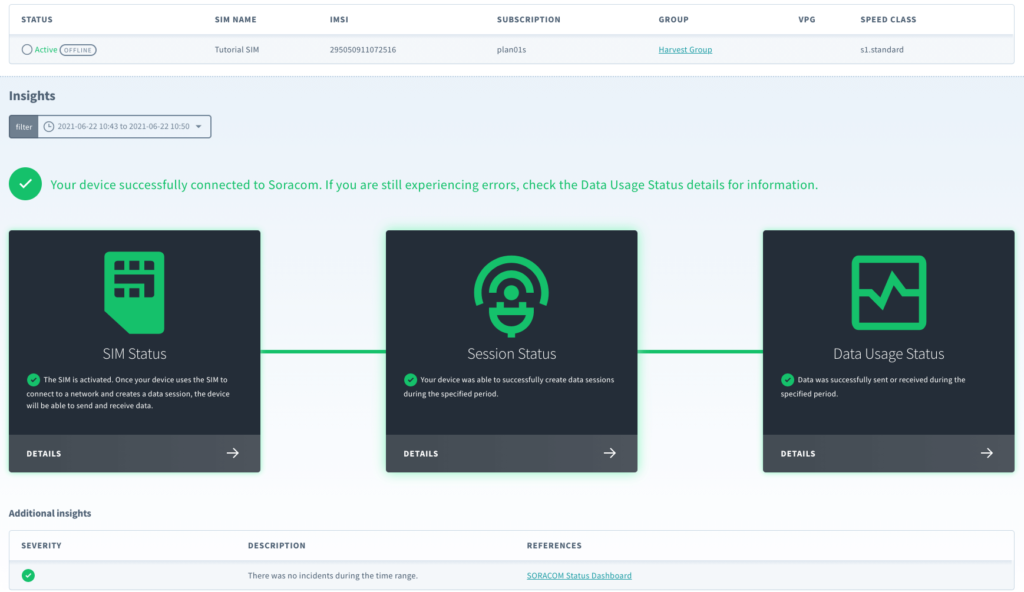
With your SIM activated and a data session established, the next step is transmitting data to Soracom. If you experience any issues at this final stage of transmitting data, the diagnostic screen will display the following error, indicating that data hasn’t been uploaded or downloaded.

To troubleshoot, try checking your device logs to look for any errors in the application or data transfer. Make sure that your device is sending data to Soracom and that everything is working as expected on the application side.
After data has successfully been transmitted between your device and Soracom, the diagnostic screen will indicate that the cellular connection is working correctly.
Click here for more information regarding data usage status
Managing Connectivity Diagnostics via API
As with every element of our platform, you can utilize the Connectivity Diagnostics functionality through the Soracom API and/or CLI.
This allows more technical developers to check a larger number of SIMs for potential connectivity issues by using a powerful REST API or intuitive CLI, without relying on the Soracom User Console.
“message”: “Your device was online during the specified period.”,
“category”: “session”,
“severity”: “none”,
“referenceURLs”: [
“url”: “https://developers.soracom.io/en/docs/air/subscriber-status/#viewing-detailed-session-status”,
For more API information, visit our developer documentation
Getting Started with Connectivity Diagnostics
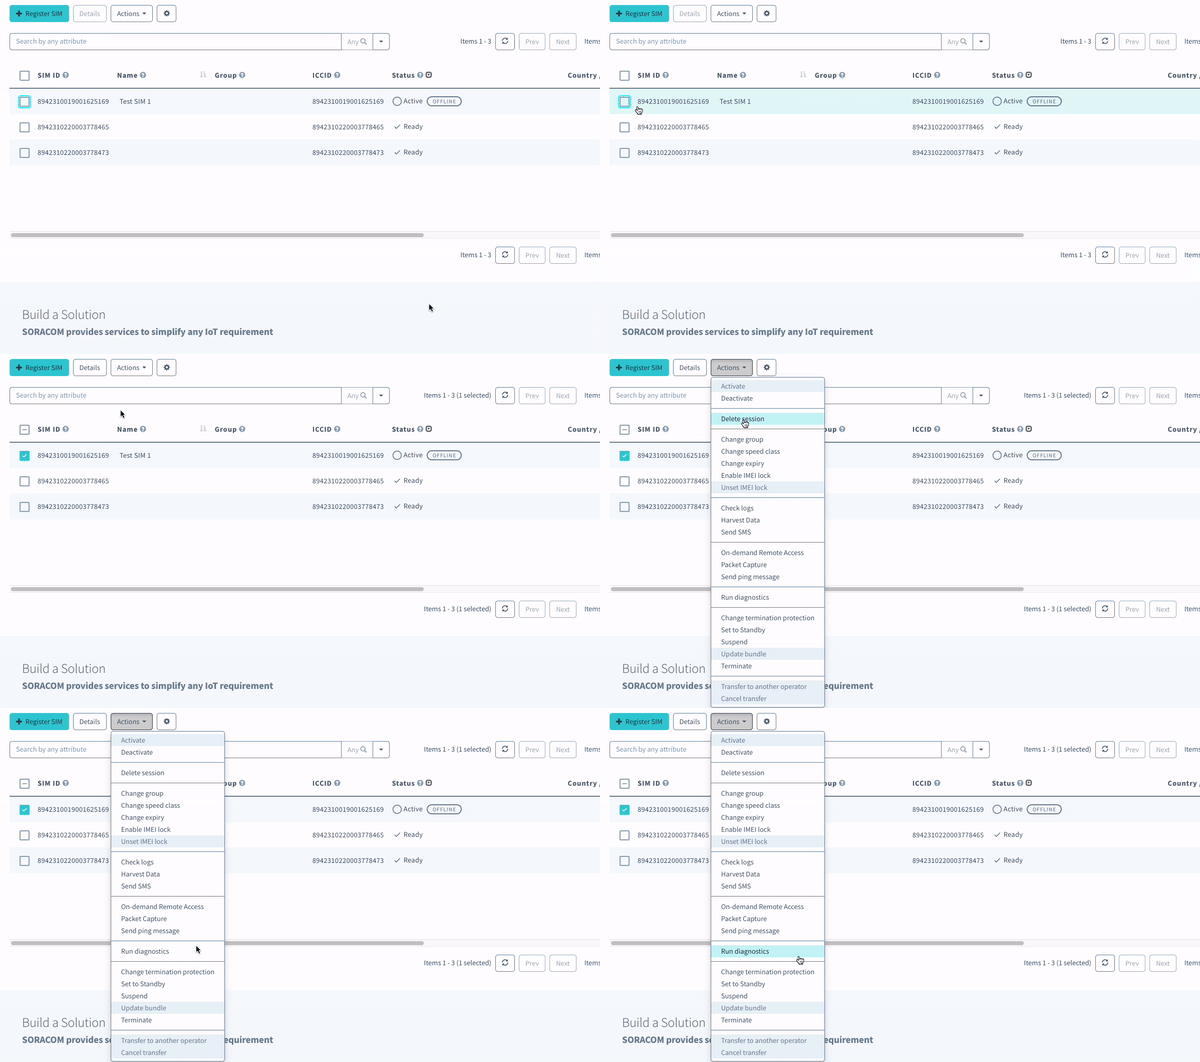
The Connectivity Diagnostics tool is available now for free to all customers from the User Console. To try it out, log in to your Soracom account, select the SIM you’re interested in, then click on the “Actions” drop-down menu, and select “Run Diagnostics.”
Summary
We know how frustrating it is when you’re developing an IoT application and struggling to get the device connected over cellular. We’ve built Connectivity Diagnostics to specifically help developers overcome connectivity challenges quickly and easily so that you can move on to the next phase of the IoT journey.
We hope by using Connectivity Diagnostics, you will be able to rapidly connect your device to Soracom.
If you have any questions or issues, please contact us here.
MORE LIKE THIS


What is Soracom?
Discover why technology innovators choose Soracom for connecting their
devices to the cloud over cellular.

Soracom's Picks
Advices and interviews, to inform and inspire.

IoT Connectivity for Construction Sites: Fiber vs. Satellite vs. Cellular (4G/5G)
The Site Manager’s Dilemma: Speed vs. Stability vs. Security When…

Why Network-Agnostic Connectivity is the Lifeblood of Physical AI
In the world of enterprise IoT, we are witnessing a…

Beyond the Chatbot: Exploring the Future of “Physical AI” at AWS re:Invent 2025
Note: This article is based on a report from Tech…


Champion in IoT
Connectivity Management
Soracom Named as a Champion for IoT Connectivity Management in 2023 Kaleido Intelligence Connectivity Vendor Hub


